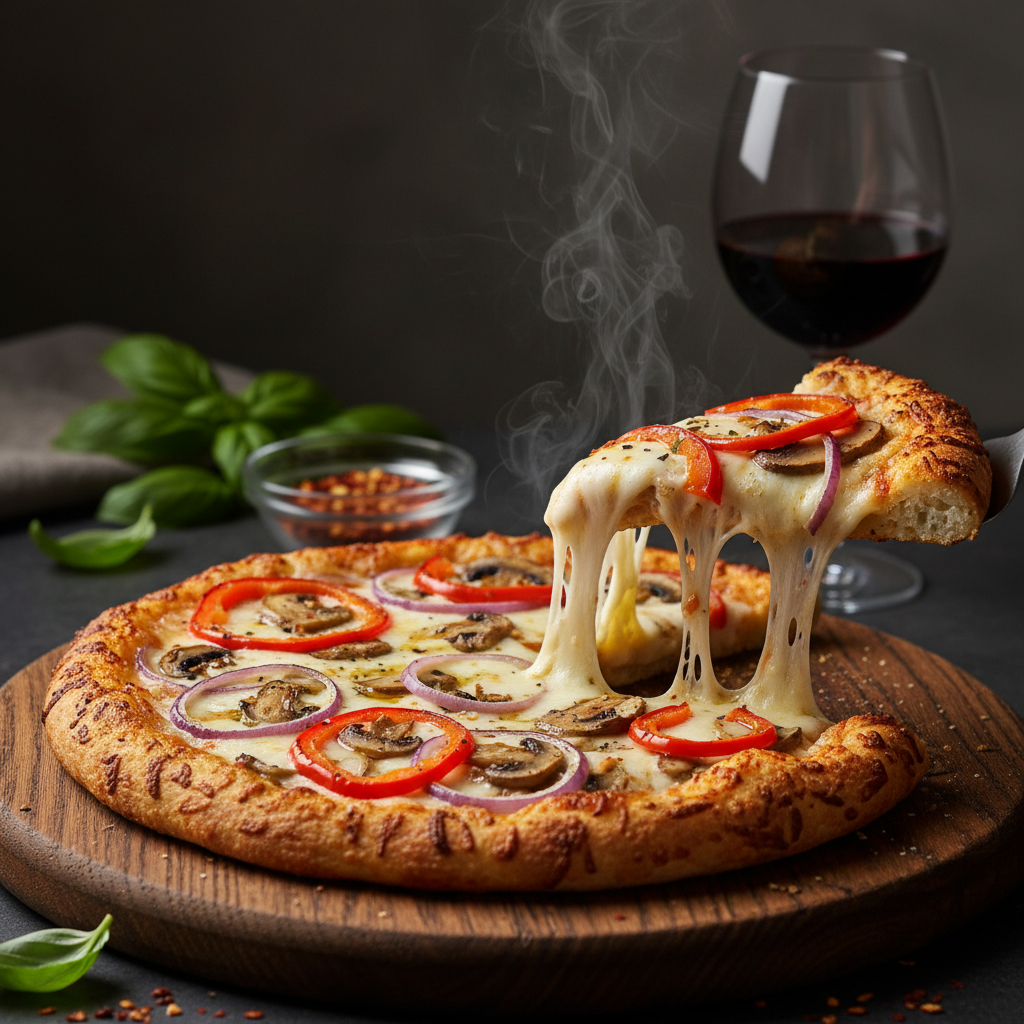
The Ultimate Crispy Keto Cauliflower Crust Pizza with Roasted Veggies
Keto Cauliflower Crust Pizza With Veggies Recipe
Satisfy your pizza cravings without the carbs using this foolproof recipe for a crispy, holdable cauliflower crust. Loaded with fresh veggies and gooey mozzarella, this gluten-free and keto-friendly dinner proves that healthy eating doesn’t mean sacrificing flavor.
20 minutes
30 minutes
50 minutes
4 servings (1 pizza)
Main Course
Baking
Italian-American
Gluten-Free
For anyone embarking on a ketogenic or low-carb lifestyle, the separation anxiety from pizza is real. We have all been there: staring longingly at a delivery box, wondering if scraping the toppings off is socially acceptable. But the culinary world has evolved, and the cauliflower revolution has changed the game entirely. This isn’t just a vegetable masquerading as bread; when done correctly, a cauliflower crust pizza offers a nutty, savory, and satisfyingly crispy base that rivals traditional dough.
The secret to this recipe lies in the texture. Many store-bought cauliflower crusts are filled with rice flour or cornstarch to bind them, spiking the carb count, while poorly executed homemade versions can end up being a soggy fork-and-knife affair. This recipe eliminates those pitfalls. We focus on removing moisture and using the right ratio of binders—cheese and egg—to create a crust that you can actually pick up with your hands.
Imagine biting into a slice that has a golden-brown, cheesy edge with a sturdy center, topped with a vibrant medley of roasted bell peppers, onions, and mushrooms. The flavor profile is complex; the cauliflower takes on a mild, roasted sweetness that pairs perfectly with the saltiness of the parmesan and the acidity of the tomato sauce. It is a meal that feels indulgent but leaves you feeling light and energized. Whether you are cooking for a family of skeptics or meal-prepping for the week, this veggie-packed pizza is about to become a staple in your kitchen rotation.
History & Origins
To understand the rise of the cauliflower pizza crust, we must first look at the trajectory of pizza itself. Originating in Naples, Italy, in the 18th century as a dish for the poor, pizza was defined by its simple yeast dough. It wasn’t until the post-World War II era that pizza became a global phenomenon. However, the 21st century brought a massive shift in dietary habits. The rise of the Atkins diet in the early 2000s, followed by the Paleo and Keto movements in the 2010s, created a massive demand for grain-free alternatives to comfort food staples.
The concept of using vegetables to replace starch isn’t entirely new—potato crusts and zucchini boats have existed for decades. However, the specific innovation of ‘riced’ cauliflower as a flour substitute gained viral traction around 2012-2014 within the health blogosphere. It was a perfect storm: cauliflower is white (mimicking flour visually), mild in flavor, and incredibly versatile. Early iterations were often crumbly or wet, leading home cooks to experiment with dehydration techniques.
By 2016, the trend had exploded. Trader Joe’s launched a frozen cauliflower crust that frequently sold out, and major pizza chains began adding it to their menus. It became a cultural symbol of the ‘wellness’ era—a way to have your cake (or pizza) and eat it too. While commercial versions often add gluten-free flours to improve shelf stability, the homemade version remains the gold standard for those strictly monitoring their carbohydrate intake. This recipe honors that modern culinary history by refining the technique to produce the closest experience to a traditional slice.
Why This Recipe Works
This recipe succeeds where many others fail because it fundamentally addresses the chemistry of the cauliflower vegetable. Cauliflower is approximately 92% water. If you simply grind it up and mix it with eggs, that water is released during the baking process, resulting in a steamed, mushy pile of vegetables rather than a crisp crust.
The ‘Why This Works’ factor here is the two-step dehydration process. First, we steam the riced cauliflower to break down the cellular structure. Second, and most importantly, we wring it out using a cheesecloth or kitchen towel. This step is non-negotiable. By removing nearly all the liquid, we are left with a dry, fibrous pulp that acts remarkably like flour.
Furthermore, the binding agents are carefully calculated. We use a combination of mozzarella and parmesan cheese. Mozzarella provides the ‘stretch’ and glue that holds the crust together, while parmesan adds a drier texture and a savory umami punch that masks the sulfurous notes sometimes associated with cauliflower. The addition of an egg provides the protein structure needed for the crust to set firm. Finally, the ‘par-bake’ method ensures the crust is fully cooked and crispy before we even add the wet toppings, preventing the sauce from soaking into the base. This scientific approach guarantees a slice that holds its own weight.
Why You’ll Love This Recipe
- ✓100% Grain-Free and Gluten-Free
- ✓Only 4g Net Carbs per serving
- ✓Sturdy crust that you can hold in your hand
- ✓Packed with fiber and essential vitamins
- ✓Customizable with your favorite low-carb toppings
- ✓Kid-friendly way to sneak in extra vegetables
Equipment You’ll Need
- ✓Food processor or box grater
- ✓Large microwave-safe bowl
- ✓Clean kitchen towel or cheesecloth
- ✓Baking sheet or pizza stone
- ✓Parchment paper
- ✓Mixing bowl
- ✓Spatula
Ingredients
- ✓1 medium head cauliflower (approx. 2 lbs), cut into florets
- ✓1 large egg, lightly beaten
- ✓1/2 cup shredded mozzarella cheese (low-moisture part-skim works best)
- ✓1/4 cup grated parmesan cheese
- ✓1 tsp dried oregano
- ✓1/2 tsp garlic powder
- ✓1/4 tsp sea salt
- ✓1/2 cup sugar-free marinara sauce
- ✓1 cup shredded mozzarella cheese (for topping)
- ✓1/2 cup bell peppers (sliced)
- ✓1/4 cup red onion (sliced)
- ✓1/4 cup sliced mushrooms
- ✓Fresh basil leaves (for garnish)
Instructions
- Preheat your oven to 400°F (200°C). Line a baking sheet with parchment paper. Do not skip the parchment paper, or the crust will stick.
- Prepare the cauliflower ‘rice’. Place the cauliflower florets into a food processor and pulse until the texture resembles coarse sand. If you don’t have a food processor, you can grate the cauliflower using a box grater.
- Cook the cauliflower rice. Place the riced cauliflower in a microwave-safe bowl and microwave on high for 4-5 minutes until soft. Alternatively, you can steam it on the stove for 5-7 minutes. Let it cool for at least 5 minutes.
- The Squeeze (Crucial Step): Transfer the cooked cauliflower to the center of a clean, thin kitchen towel or cheesecloth. Gather the corners and twist the towel to squeeze out as much liquid as possible. Be aggressive here; you want to extract nearly a cup of liquid. The cauliflower should look like a dry ball of dough when you are done.
- Make the dough. In a medium mixing bowl, combine the dried cauliflower pulp, beaten egg, 1/2 cup shredded mozzarella, parmesan cheese, oregano, garlic powder, and salt. Mix well with your hands or a spatula until a dough forms.
- Shape the crust. Place the dough onto the parchment-lined baking sheet. Press and flatten the dough into a circle or oval, about 1/4-inch thick. Build up the edges slightly to create a ‘crust’ rim.
- Par-bake. Bake the crust in the preheated oven for 15-20 minutes, or until the top is golden brown and dry to the touch. Remove from the oven.
- Top the pizza. Spread the marinara sauce evenly over the crust, leaving the edges exposed. Sprinkle the remaining 1 cup of mozzarella cheese over the sauce. Arrange the bell peppers, onions, and mushrooms on top.
- Final Bake. Return the pizza to the oven and bake for another 10-12 minutes, or until the cheese is melted and bubbly and the vegetables are tender-crisp. For extra charred cheese, broil for the last 1-2 minutes (watch closely!).
- Cool and Serve. Let the pizza cool for 5 minutes before slicing. This allows the cheese to set and ensures the crust stays firm. Garnish with fresh basil and serve.
Expert Cooking Tips
- ✓Use a cheesecloth or a very thin tea towel for squeezing; thick terry cloth towels absorb too much liquid and make squeezing difficult.
- ✓If you want an even crispier crust, flip the crust over carefully after the first 15 minutes of baking and bake for another 5 minutes before adding toppings.
- ✓Avoid using fresh mozzarella balls for the topping as they release too much water; stick to low-moisture shredded mozzarella.
- ✓Don’t overload the pizza with heavy toppings, as the cauliflower crust is more delicate than wheat dough.
- ✓You can use frozen riced cauliflower to save time. Just thaw it completely and proceed directly to the squeezing step.
- ✓Grease the parchment paper lightly with olive oil spray to ensure absolutely no sticking.
Substitutions and Variations
This recipe is highly adaptable to various dietary needs and pantry staples. If you don’t have a head of cauliflower, you can use two bags of frozen riced cauliflower; just thaw and squeeze (skip the steaming step). For the binding cheese, mild cheddar or provolone can substitute for mozzarella, though mozzarella offers the most neutral flavor. If you are dairy-free, you can substitute the cheese in the crust with a vegan melting cheese alternative and add a tablespoon of almond flour to help with binding, though the crust may be less crispy. The egg is difficult to replace as it provides structure, but a ‘flax egg’ (1 tbsp ground flaxseed meal + 3 tbsp water) can work in a pinch for a vegan version, resulting in a softer crust. For toppings, the sky is the limit: try pepperoni, cooked sausage, spinach, olives, or artichokes. Just ensure any vegetable toppings are not overly wet.
Common Mistakes to Avoid
The single most common mistake is under-squeezing the cauliflower. If you skip this or do it half-heartedly, your crust will be mushy and will fall apart when you try to lift a slice. Another mistake is rolling the dough too thick; keep it around 1/4 inch so heat can penetrate evenly. Using wax paper instead of parchment paper is a disaster waiting to happen—wax paper will melt and stick to your crust. Finally, be careful not to use too much sauce. Cauliflower crust is not as absorbent as bread, so excess sauce will run off and make the cheese slide around.
Serving Suggestions
This pizza is a complete meal on its own, but it pairs beautifully with a fresh, crisp side salad. A simple arugula salad with lemon vinaigrette and shaved parmesan cuts through the richness of the cheese. You could also serve it alongside roasted asparagus or a light cucumber tomato salad. For dipping, offer a side of sugar-free ranch dressing or garlic butter sauce. If you are hosting a keto dinner party, slice the pizza into small squares to serve as an appetizer.
Storage and Reheating Tips
Leftover cauliflower pizza stores surprisingly well. Place any remaining slices in an airtight container or wrap them tightly in aluminum foil. They will keep in the refrigerator for up to 3-4 days. To reheat, do not use the microwave, as this will make the crust rubbery. Instead, place the slices on a baking sheet or directly on the oven rack at 350°F (175°C) for 5-8 minutes until the cheese is bubbly and the crust has crisped up again. You can also reheat slices in a dry skillet over medium heat or in an air fryer for 3-4 minutes.
Nutrition Facts (Estimated)
| Serving Size | 2 slices |
| Calories | 320 |
| Fat | 22g |
| Saturated Fat | 10g |
| Unsaturated Fat | 10g |
| Trans Fat | 0g |
| Cholesterol | 85mg |
| Sodium | 650mg |
| Carbohydrates | 9g |
| Fiber | 5g |
| Sugar | 4g |
| Protein | 24g |
Frequently Asked Questions
Can I freeze the crust?
Yes! You can par-bake the crust, let it cool completely, and then wrap it tightly in plastic wrap and foil. Freeze for up to 3 months. When ready to eat, add toppings to the frozen crust and bake until hot.
Why is my crust soggy?
Sogginess is almost always caused by excess moisture. Ensure you squeeze the cauliflower until it is basically a dry pulp. Also, make sure you don’t overload the center with heavy sauce or wet vegetables.
Can I use a blender instead of a food processor?
It is risky. Blenders tend to turn cauliflower into a puree rather than ‘rice.’ If you must use a blender, chop the cauliflower into small pieces first, use the pulse setting, and work in small batches.
Is this recipe strictly Keto?
Yes, with approximately 4g net carbs per serving, this fits perfectly into a standard ketogenic diet. The main carb sources are the cauliflower itself and the vegetables, which are fiber-rich.
Does it taste exactly like regular pizza?
It tastes delicious, but it is different. It has a nuttier flavor and a slightly different texture than wheat dough. However, with the cheese and toppings, it satisfies the pizza craving effectively.
Can I use store-bought riced cauliflower?
Absolutely. This is a great time-saver. You can buy fresh riced cauliflower in the produce section or frozen. If using frozen, thaw and squeeze; no need to microwave first.
How do I get the edges charred?
Rub a tiny bit of olive oil on the edges of the crust before the final bake, or switch your oven to ‘Broil’ for the last 90 seconds of cooking—just watch it like a hawk so it doesn’t burn.
Can I make this without a microwave?
Yes, you can steam the riced cauliflower in a pot with a small amount of water, or sauté it in a dry pan until soft. The goal is just to cook it enough to release the water.
Conclusion
Mastering the art of the cauliflower crust is a rite of passage for anyone living a low-carb lifestyle, and once you nail this recipe, you will wonder why you ever settled for the frozen cardboard versions from the grocery store. The combination of the savory, cheesy base with the fresh crunch of roasted vegetables makes for a dinner that feels special yet is simple enough for a Tuesday night. It allows you to gather around the table and enjoy ‘pizza night’ with friends and family without compromising your health goals. So grab your cheesecloth, preheat that oven, and get ready to enjoy the best guilt-free slice you have ever tasted. Bon appétit!