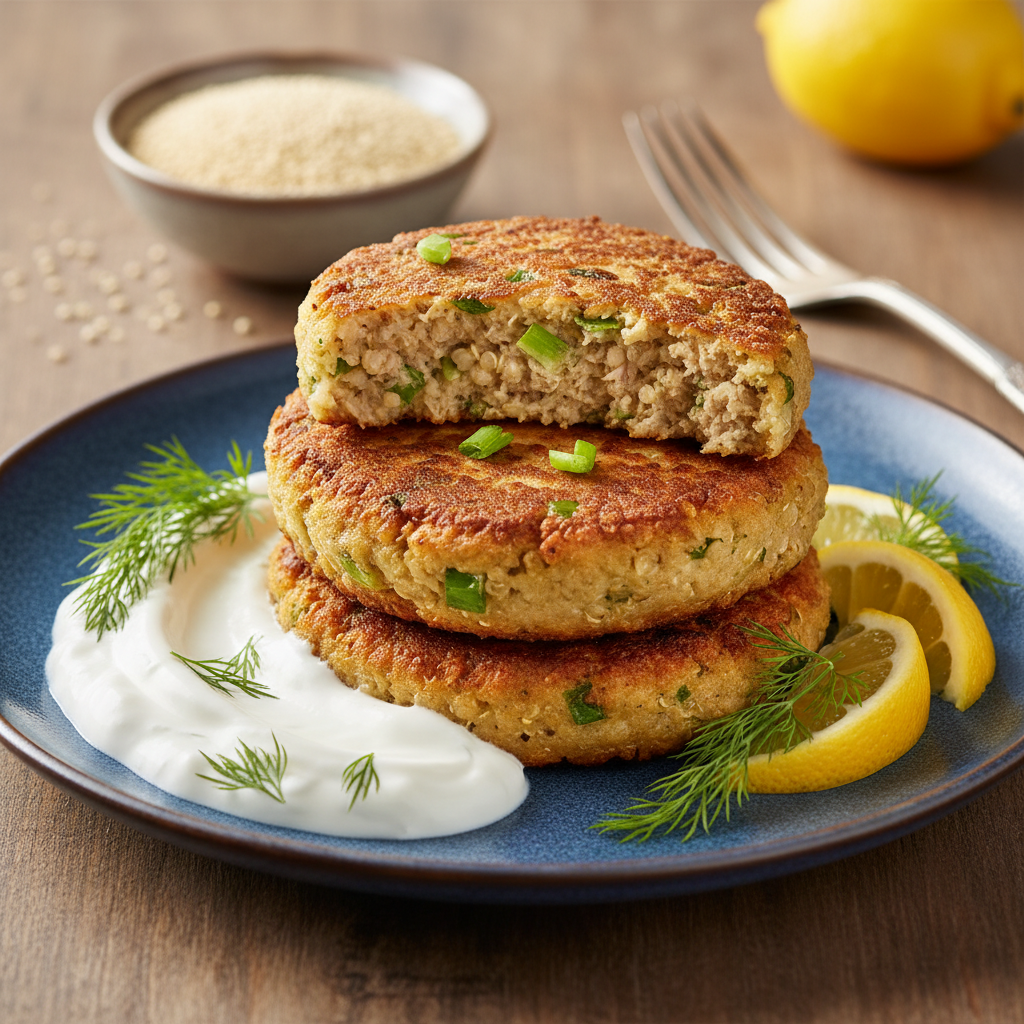
Crispy Baked Tuna And Quinoa Patties: The Ultimate Healthy Protein Packed Recipe
Tuna And Quinoa Patties Baked Healthy Recipe
Discover the perfect blend of wholesome ingredients with these crispy Baked Tuna and Quinoa Patties. Packed with protein and bursting with fresh herbs and zesty lemon, these golden bites offer a nutritious, kid-friendly solution for busy weeknight dinners or meal-prep lunches without the guilt of frying.
20 minutes
25 minutes
45 minutes
12 patties
Main Course
Baking
American / Fusion
Pescatarian
In the bustling world of modern home cooking, finding a recipe that effortlessly bridges the gap between nutritious, delicious, and convenient is akin to striking gold. Enter the Baked Tuna and Quinoa Patty—a humble yet heroic dish that transforms pantry staples into a gourmet-style meal. As we navigate the demands of busy schedules and the desire for clean eating, this recipe stands out as a beacon of culinary balance. It’s not just about tossing ingredients into a bowl; it’s about creating a textural masterpiece where the nutty, fluffy grains of quinoa meet the savory richness of flaked tuna, all bound together with aromatic herbs and a hint of citrus zest.
For many of us, canned tuna is a nostalgic staple, often relegated to mayonnaise-heavy salads or simple sandwiches. However, this recipe elevates the modest tin of fish into something sophisticated enough for a dinner party yet accessible enough for a quick Tuesday night meal. The beauty lies in the baking method. By skipping the deep fryer, we eliminate unnecessary grease while still achieving that coveted golden-brown crust that shatters satisfyingly upon the first bite. The interior remains moist and tender, flavored deeply with garlic, onions, and perhaps a touch of Dijon mustard for that subtle kick.
Moreover, this dish is a powerhouse of nutrition. Quinoa, often hailed as a superfood, provides a complete protein source, meaning it contains all nine essential amino acids. When paired with lean tuna, you get a double dose of protein that keeps you satiated for hours. Whether you are looking for a post-workout refuel, a toddler-friendly finger food, or a light lunch to top your greens, these patties fit the bill perfectly. Join me as we dive into the details of creating these savory cakes, ensuring that every batch you bake comes out perfectly crisp and undeniably delicious.
History & Origins
While the specific combination of tuna and quinoa in a patty form is a relatively modern invention born out of the health food movement of the early 21st century, its roots dig deep into the culinary traditions of fish cakes and croquettes. The concept of mincing fish, mixing it with a starch and binder, and cooking it into a cake is a practice found in cultures across the globe. From the salt cod fritters (bacalaitos) of the Caribbean to the delicate fish cakes of Thai cuisine and the classic potato-bound fish cakes of New England, humanity has long understood the value of extending protein with affordable fillers.
Historically, fish cakes were a method of preservation and economy—a way to use up leftover cooked fish or smaller catches that weren’t suitable for fillets. In the 19th century, as canned foods became popularized during the industrial revolution, canned salmon and tuna became household staples in the United States and Europe. This accessibility led to the rise of the ‘tuna croquette’ in mid-century American cooking, often bound with breadcrumbs or mashed potatoes and fried in lard or oil.
The introduction of quinoa to the Western palate adds a fascinating layer to this history. Cultivated for thousands of years by the Indigenous peoples of the Andes, quinoa was known as ‘chisaya mama’ or ‘mother of all grains.’ It wasn’t until the 2000s that quinoa exploded onto the global scene, celebrated for its gluten-free status and high protein content. The fusion of this ancient grain with the Western tradition of the tuna patty represents a culinary evolution—shifting away from heavy, starchy fillers like potatoes towards nutrient-dense, complex carbohydrates. This modern iteration reflects a global shift towards functional nutrition, where every ingredient is chosen not just for taste or economy, but for the specific health benefits it brings to the table.
Why This Recipe Works
This recipe succeeds where many others fail because it meticulously addresses the two most common complaints about veggie or fish burgers: texture and structural integrity. Often, baked patties can turn out dry or crumbly, falling apart the moment they are flipped or bitten into. This recipe combats that by using a precise ratio of cooked quinoa to tuna and binding agents (eggs and a small amount of breadcrumbs or oat flour). The quinoa acts as a unique binder; its small granules fill the gaps between the tuna flakes, creating a dense yet light network that holds together beautifully without becoming heavy like a potato-based cake.
Flavor-wise, this recipe works because it balances the strong, oceanic taste of tuna with bright, fresh aromatics. Tuna can sometimes be overpowering or ‘fishy,’ but the inclusion of lemon zest, fresh parsley, and scallions cuts through that richness, providing a clean, zesty profile that appeals even to those who are on the fence about seafood. The addition of a little Dijon mustard and garlic powder adds a savory depth (umami) that elevates the overall taste.
Finally, the baking method is optimized for health without sacrificing the crunch. By brushing the patties with a small amount of olive oil and baking at a relatively high temperature (400°F/200°C), we encourage the Maillard reaction—browning the exterior proteins and sugars—creating a crisp shell. This technique avoids the oil absorption of pan-frying, resulting in a lighter patty that doesn’t leave you feeling weighed down. It is a foolproof method that yields consistent, restaurant-quality results in a home kitchen.
Why You’ll Love This Recipe
- ✓High-protein and nutrient-dense meal suitable for the whole family.
- ✓Oven-baked for a crispy exterior without the excess oil of frying.
- ✓Budget-friendly using pantry staples like canned tuna and quinoa.
- ✓Excellent for meal prep—freezes and reheats beautifully.
- ✓Versatile serving options: on salads, in buns, or as an appetizer.
- ✓Gluten-free adaptable by simply swapping breadcrumbs for gluten-free alternatives.
Equipment You’ll Need
- ✓Large mixing bowl
- ✓Fine-mesh sieve (for rinsing quinoa)
- ✓Small saucepan with lid
- ✓Baking sheet
- ✓Parchment paper or silicone baking mat
- ✓Fork (for flaking tuna)
- ✓Measuring cups and spoons
- ✓Chef’s knife and cutting board
- ✓Pastry brush (optional)
Ingredients
- ✓1 cup quinoa, uncooked (yields approx. 3 cups cooked)
- ✓2 cups water or vegetable broth
- ✓3 cans (5 oz each) tuna in water, drained well
- ✓4 large eggs, beaten
- ✓1 cup panko breadcrumbs (use gluten-free if needed) or oat flour
- ✓1/2 cup finely chopped green onions (scallions)
- ✓1/4 cup fresh parsley, chopped
- ✓1 tablespoon Dijon mustard
- ✓2 cloves garlic, minced
- ✓1 teaspoon lemon zest
- ✓1 tablespoon lemon juice
- ✓1/2 teaspoon salt
- ✓1/2 teaspoon black pepper
- ✓1/2 teaspoon paprika
- ✓2 tablespoons olive oil (for brushing)
Instructions
- Start by rinsing the quinoa thoroughly under cold water in a fine-mesh sieve to remove the natural saponin coating, which can taste bitter.
- In a small saucepan, combine the rinsed quinoa and water (or broth). Bring to a boil over high heat, then reduce to low, cover, and simmer for 15 minutes or until the water is absorbed. Remove from heat and let it sit covered for 5 minutes. Fluff with a fork and allow to cool to room temperature.
- Preheat your oven to 400°F (200°C). Line a large baking sheet with parchment paper or a silicone baking mat for easy cleanup.
- While the oven heats, drain the canned tuna very well. Press down on the lid or use a sieve to squeeze out as much liquid as possible. This is crucial for the patties to hold together.
- In a large mixing bowl, combine the cooled quinoa, drained tuna, beaten eggs, breadcrumbs, green onions, parsley, garlic, Dijon mustard, lemon zest, lemon juice, salt, pepper, and paprika.
- Mix the ingredients thoroughly until everything is evenly distributed. The mixture should be moist enough to stick together but not soaking wet.
- Using your hands or a 1/3 cup measure, scoop the mixture and form it into patties. Press them firmly to compact the ingredients. You should get about 12 patties.
- Place the patties onto the prepared baking sheet, leaving a little space between each one.
- Brush the tops of the patties generously with olive oil. This helps them brown and crisp up in the oven.
- Bake for 20-25 minutes, flipping the patties halfway through carefully. Bake until they are golden brown on both sides and firm to the touch.
- Remove from the oven and let them cool on the baking sheet for 5 minutes before serving. They firm up slightly as they cool.
Expert Cooking Tips
- ✓Ensure the quinoa is completely cooled before mixing with the eggs; hot quinoa can scramble the eggs prematurely.
- ✓Drain the tuna aggressively. Excess moisture is the enemy of a crispy patty.
- ✓If the mixture feels too wet and won’t hold its shape, add more breadcrumbs a tablespoon at a time.
- ✓If the mixture is too dry and crumbly, add an extra egg or a tablespoon of mayonnaise.
- ✓Chill the formed patties in the refrigerator for 20 minutes before baking to help them hold their shape better.
- ✓Use an ice cream scoop for uniform patty sizes, ensuring even cooking.
- ✓Don’t skip the lemon zest; it adds a brightness that heavy seasoning cannot replicate.
Substitutions and Variations
This recipe is incredibly flexible and forgiving, allowing for numerous substitutions to fit dietary needs or pantry availability. If you need this to be gluten-free, swap the panko breadcrumbs for certified gluten-free breadcrumbs, crushed gluten-free crackers, or almond flour. Rolled oats pulsed into a coarse flour also work excellently as a binder. For the tuna, you can easily substitute canned salmon, canned chicken, or even mashed chickpeas for a vegetarian version, though the texture will differ slightly. If you don’t have fresh green onions, finely diced red onion or shallots offer a nice sweetness. Fresh parsley can be replaced with fresh dill or cilantro depending on the flavor profile you prefer; dill pairs exceptionally well with lemon and tuna. For the binder, if you are out of eggs, a ‘flax egg’ (ground flaxseed mixed with water) can work, though the patties will be more fragile. Lastly, the Dijon mustard can be swapped for spicy brown mustard or even a teaspoon of mayonnaise if you prefer a creamier internal texture.
Common Mistakes to Avoid
The most common mistake when making tuna and quinoa patties is failing to drain the ingredients properly. Canned tuna holds a surprising amount of water, and if not squeezed dry, your patties will be mushy and may fall apart on the baking sheet. Similarly, wet quinoa can introduce too much moisture. Another error is over-mixing the batter; while you want the ingredients combined, mashing them into a paste removes the nice texture of the quinoa grains and tuna flakes. Many home cooks also skip the ‘resting’ phase. Letting the quinoa cool is vital, but also chilling the shaped patties before baking can significantly improve their structural integrity. Finally, be gentle when flipping. These patties are tender until they form a crust, so use a wide, thin spatula and flip with confidence but care to avoid breaking them in half.
Serving Suggestions
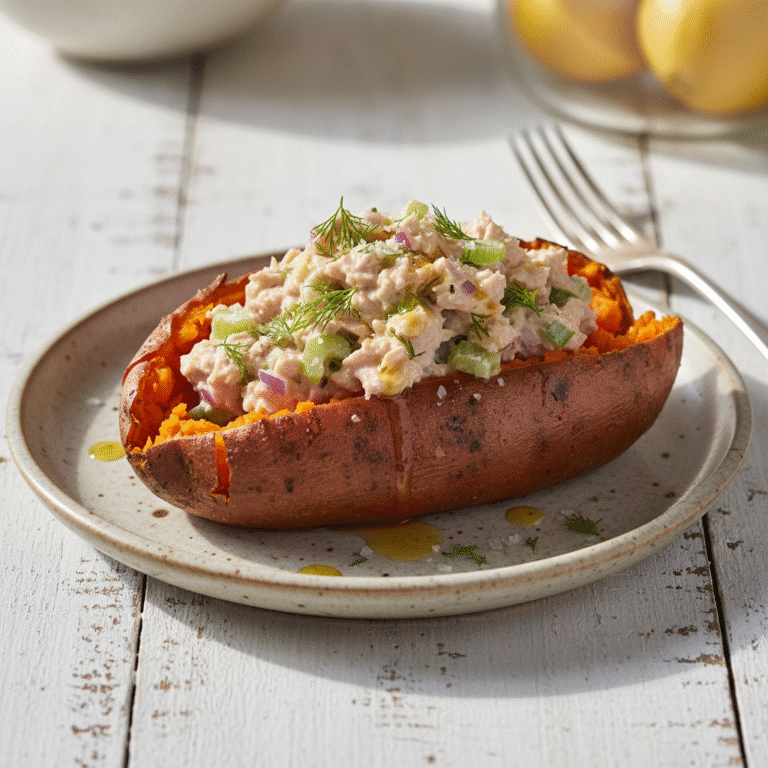
These patties are incredibly versatile. Serve them hot as a main course alongside a crisp green salad with a vinaigrette dressing or roasted vegetables like asparagus and broccoli. They are fantastic inside a burger bun or pita pocket with lettuce, tomato, and a slice of avocado for a healthy lunch sandwich. For a dipping sauce, a lemon-dill yogurt sauce (Greek yogurt, lemon juice, fresh dill, and garlic) is the perfect accompaniment, cutting through the savory notes of the patty. They also work well as an appetizer; simply make them smaller (bite-sized) and serve with a spicy sriracha mayo or tartar sauce. For meal prep, pair two patties with a side of sweet potato fries and steamed green beans.
Storage and Reheating Tips
These patties store wonderfully, making them a meal prep champion. To store in the refrigerator, let them cool completely and then place them in an airtight container, separating layers with parchment paper to prevent sticking. They will keep for up to 4 days. To reheat, place them in a toaster oven or air fryer at 350°F for 5-8 minutes to restore their crispiness; microwaving works but will result in a softer texture. For freezing, flash freeze the cooked and cooled patties on a baking sheet for an hour, then transfer them to a freezer-safe bag or container. They can be frozen for up to 3 months. You can reheat them directly from frozen in the oven at 375°F for about 15-20 minutes.
Nutrition Facts (Estimated)
| Serving Size | 2 patties |
| Calories | 260 |
| Fat | 9g |
| Saturated Fat | 2g |
| Unsaturated Fat | 6g |
| Trans Fat | 0g |
| Cholesterol | 115mg |
| Sodium | 480mg |
| Carbohydrates | 22g |
| Fiber | 3g |
| Sugar | 2g |
| Protein | 21g |
Frequently Asked Questions
Can I use canned salmon instead of tuna?
Absolutely. Canned salmon is a fantastic substitute and offers a rich dose of Omega-3 fatty acids. Just be sure to remove any skin or bones if your brand includes them, and drain it just as thoroughly as you would the tuna.
Why are my patties falling apart?
This usually happens due to excess moisture or not enough binder. Ensure you squeeze the tuna very dry and let the quinoa cool. If they still feel loose, add a bit more breadcrumbs or an extra egg. Chilling the patties before baking also helps solidify the fats and binders.
Can I fry these instead of baking?
Yes, you can pan-fry them. Heat a few tablespoons of oil in a non-stick skillet over medium heat. Cook the patties for about 3-4 minutes per side until golden brown. Note that this will increase the calorie count slightly compared to baking.
Is this recipe gluten-free?
It can be! The only ingredient containing gluten is the breadcrumbs. Simply swap them for gluten-free breadcrumbs, almond flour, or gluten-free oat flour to make the recipe completely safe for those with celiac disease or gluten sensitivity.
Can I make the mixture ahead of time?
Yes, you can prepare the mixture and store it in the refrigerator for up to 24 hours before shaping and baking. In fact, this often allows the flavors to meld together even better.
What is the best sauce to serve with these?
A creamy, tangy sauce works best to contrast the savory patty. A mixture of Greek yogurt, lemon juice, dill, and a pinch of garlic salt is a classic pairing. Alternatively, a spicy chipotle mayo or a simple tartar sauce is delicious.
Do I have to use quinoa?
Quinoa provides a unique texture and nutritional profile, but if you don’t have it, you can substitute cooked brown rice, millet, or couscous. Keep in mind that couscous is not gluten-free.
Can I freeze the patties uncooked?
It is generally better to bake them first and then freeze. Uncooked patties can be very fragile and might lose their shape or get freezer burn more easily due to the moisture content in the raw egg and vegetables.
How do I know when they are done?
The patties should be golden brown on the outside and firm to the touch. If you insert a thermometer, the internal temperature should reach 160°F (71°C) since they contain raw eggs.
Can I add cheese to the mixture?
Yes! Adding 1/2 cup of shredded cheddar, mozzarella, or parmesan cheese to the mixture adds a delicious gooey texture and salty flavor that kids especially love.
Conclusion
These Baked Tuna and Quinoa Patties are truly a testament to how simple ingredients can come together to create something nourishing and delightful. They prove that healthy eating doesn’t have to be complicated, expensive, or flavorless. By combining the protein-rich power of tuna and quinoa with fresh herbs and baking them to crispy perfection, you have a meal that satisfies the craving for comfort food while fueling your body with high-quality nutrients. Whether you are whipping these up for a quick family dinner, prepping lunches for the week ahead, or looking for a new way to use that can of tuna in your pantry, this recipe is sure to become a regular in your kitchen rotation. Enjoy the crunch, savor the flavor, and feel good about what you’re eating!