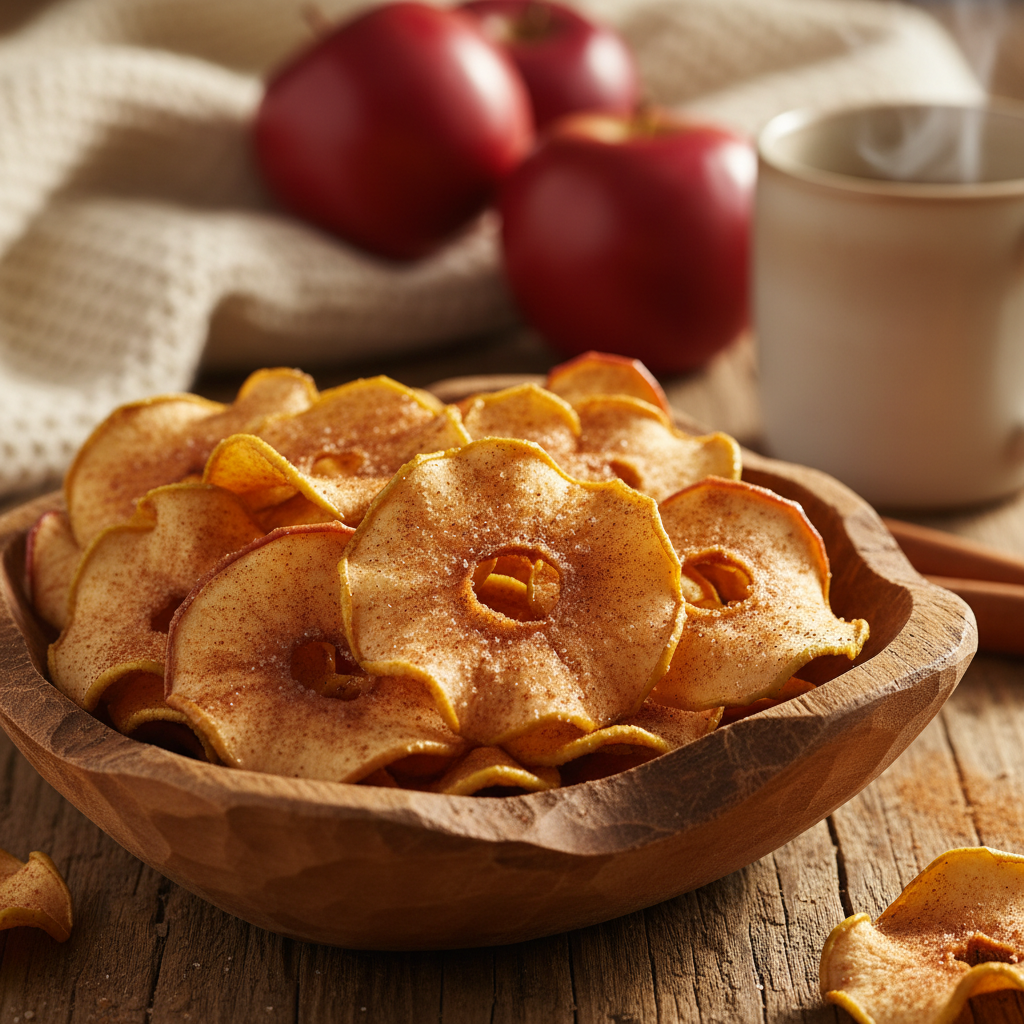
Crispy Baked Cinnamon Apple Chips: The Ultimate Healthy Fall Snack
Baked Cinnamon Apple Chip Healthy Snack Recipe
Transform simple apples into an addictive, crunchy treat with this easy Baked Cinnamon Apple Chips recipe. Naturally sweet, perfectly spiced, and guilt-free, they are the ultimate healthy alternative to potato chips that the whole family will love.
15 minutes
2 hours 30 minutes
2 hours 45 minutes
4 servings
Snack
Baking
American
Vegan
There is something undeniably magical about the arrival of autumn. The air turns crisp, the leaves transform into a vibrant tapestry of fiery reds and golds, and the kitchen begins to smell of warm spices and comfort. While pumpkin spice often steals the spotlight, the humble apple is the true workhorse of the season. Whether you have just returned from a wholesome day of apple picking at a local orchard or simply found a great deal on Honeycrisps at the grocery store, you are likely staring at a surplus of fruit wondering what to do next. Enter the Baked Cinnamon Apple Chip—a recipe that is as simple as it is transformative.
We all crave that satisfying ‘crunch’ when snacking. Usually, that craving leads us down the aisle of processed potato chips or crackers laden with sodium and artificial preservatives. But what if you could achieve that same shatteringly crisp texture using nothing but fruit and a dusting of spice? These apple chips are a revelation in texture and flavor concentration. As the apples bake slowly at a low temperature, the water evaporates, leaving behind a concentrated essence of apple flavor that is far sweeter and more intense than the raw fruit. The natural sugars caramelize ever so slightly, and when paired with the warming heat of cinnamon, the result is a snack that tastes like candy but nourishes like fruit.
This recipe is not just a healthy substitution; it is a culinary upgrade. Unlike store-bought apple chips, which can often be spongy or overly expensive for a mostly-air bag, homemade chips allow you to control the thickness, the spice level, and the crispness. They are naturally gluten-free, vegan, and paleo-friendly, making them the perfect crowd-pleaser for school lunches, office snacks, or a cozy movie night. Prepare to have your kitchen filled with the most intoxicating aroma of baked apple pie, without any of the fuss of making a crust.
History & Origins
The history of drying fruit is as old as civilization itself, born out of the necessity to preserve the harvest for the lean winter months. Long before the advent of refrigeration or canning, ancient cultures discovered that removing moisture from fruit inhibited the growth of bacteria and mold, allowing food to be stored for years. Archaeological evidence suggests that early Mesopotamians and Egyptians were drying dates, figs, and apples in the hot desert sun as early as 4000 BC. These dried fruits were not just snacks; they were high-energy sustenance for travelers, soldiers, and traders traversing the Silk Road.
In the context of the apple specifically, the fruit’s journey is deeply intertwined with American history. When European colonists arrived in North America, they brought apple seeds with them. However, the apples grown from these seeds were often bitter and used primarily for making hard cider. It wasn’t until the legendary figure of John Chapman, known popularly as Johnny Appleseed, traversed the frontier planting nurseries that apples became a staple of the American diet. During the harsh winters of the 18th and 19th centuries, ‘dried apples’ were a pantry essential. They were strung up on strings near the hearth or spread out on roof racks to dry in the autumn sun. These dried rings were later rehydrated for pies, sauces, and stews when fresh fruit was unavailable.
Today, the apple chip has evolved from a survival ration to a premium health food. The modern ‘chip’ form—thin, crispy, and snackable—is a relatively recent innovation, popularized by the health food movement of the late 20th century which sought alternatives to fried snacks. While industrial freeze-drying technology now dominates the grocery aisle, the traditional method of slow-baking apples remains a cherished home-cooking tradition that connects us to our ancestors’ ingenuity.
Why This Recipe Works
The success of this recipe relies on a fundamental understanding of food science: dehydration and sugar concentration. Many home cooks attempt apple chips only to end up with fruit that is burnt on the edges but soggy in the middle, or leathery rather than crispy. This recipe solves those problems through precise temperature control and preparation techniques.
First, the temperature of 200°F (95°C) is crucial. This is low enough to evaporate moisture without burning the fruit’s natural sugars (fructose). If the oven were hotter, the sugars would caramelize and burn before the water had a chance to escape, resulting in a bitter taste and soft texture. By cooking low and slow, we allow the cellular structure of the apple to stiffen gradually.
Second, the use of a mandoline slicer is the secret weapon for consistency. Knife-cut slices are inevitably uneven; a thick wedge will never crisp up at the same rate as a paper-thin edge. A mandoline ensures every single chip is exactly the same thickness (ideally 1/8 inch), guaranteeing they all finish baking at the same time.
Finally, the cooling process is where the magic actually happens. When you pull the apples out of the oven, they might still feel slightly pliable. This is normal. As they cool to room temperature, the residual heat dissipates, and the sugars harden, snapping the texture from soft to shattering crisp. This recipe works because it respects the patience required to alter the apple’s physical state without destroying its flavor.
Why You’ll Love This Recipe
- ✓Only 2 ingredients required
- ✓Naturally gluten-free, vegan, and paleo
- ✓No added sugar necessary
- ✓Costs a fraction of store-bought brands
- ✓High in fiber and vitamin C
- ✓Perfect way to use up bruised or older apples
Equipment You’ll Need
- ✓Mandoline Slicer (highly recommended for even slices)
- ✓Two large baking sheets
- ✓Parchment paper or silicone baking mats
- ✓Wire cooling rack
- ✓Apple corer (optional)
- ✓Airtight storage container
Ingredients
- ✓3 large apples (Honeycrisp, Fuji, or Pink Lady work best)
- ✓1 1/2 teaspoons ground cinnamon
- ✓1 teaspoon granulated sugar (optional, for extra crunch)
- ✓Pinch of nutmeg (optional)
Instructions
- Preheat your oven to 200°F (95°C). Position your oven racks in the upper and lower thirds of the oven to ensure even heat distribution.
- Wash and dry the apples thoroughly. You do not need to peel them; the skin adds fiber, color, and helps the chip hold its shape.
- Using a mandoline slicer, slice the apples horizontally into 1/8-inch thick rounds. If you don’t have a mandoline, use a very sharp chef’s knife and aim for consistent thinness. Discard the bottommost and topmost slices that are mostly skin.
- Pick out any seeds from the center of the slices. If you prefer a perfect ring, you can core the apple before slicing, but the star pattern in the center is visually appealing.
- Line two large baking sheets with parchment paper or silicone baking mats. Arrange the apple slices in a single layer. It is crucial that they do not overlap, or they will stick together and fail to crisp.
- Mix the cinnamon and optional sugar/nutmeg in a small bowl. Dust the spice mixture evenly over the apple slices. You can do this by hand or use a small sieve for better distribution.
- Place the baking sheets in the oven. Bake for 1 hour.
- After 1 hour, remove the pans and flip each apple slice over. This ensures both sides dry evenly and prevents sticking.
- Return to the oven and bake for another 1 to 1.5 hours. The total time depends on the moisture content of your specific apples. You know they are done when the edges curl up and they feel dry to the touch, though they may still be slightly soft in the center.
- Turn off the oven and let the apples sit inside as the oven cools down for 30 minutes (this acts as a final dehydration step), or remove them immediately if they look very brown.
- Transfer the chips to a wire cooling rack. They will continue to crisp up significantly as they cool completely. Do not package them until they are 100% cool.
Expert Cooking Tips
- ✓Use firm, crisp apples like Honeycrisp, Fuji, or Gala. Mealy apples like Red Delicious do not yield a good texture.
- ✓If your oven has a convection setting (fan), use it! It circulates air and speeds up the dehydration process, reducing cook time by about 30-45 minutes.
- ✓Do not skip the cooling rack. Leaving them on the hot pan can cause them to steam slightly underneath, losing their crunch.
- ✓If you slice your apples thinner than 1/8 inch, check them after 1.5 hours total time to prevent burning.
- ✓For a ‘clean’ look, dip the apple slices in lemon water briefly before baking to prevent oxidation (browning), though the cinnamon usually hides this anyway.
Substitutions and Variations
This recipe is incredibly versatile and forgiving. If you want to avoid refined sugar completely, simply omit the optional sugar; the apples are naturally sweet enough on their own. For a different flavor profile, swap the cinnamon for pumpkin pie spice, cardamom, or even a pinch of ginger for a spicy kick. If you enjoy a sweet and savory combination, a tiny sprinkle of sea salt or cayenne pepper can add a gourmet twist. In terms of fruit, this method works relatively well with pears, though pears have a higher water content and may require a longer baking time. Maple syrup or honey is not recommended as a coating before baking because the liquid content prevents the chips from drying out properly and remains sticky.
Common Mistakes to Avoid
The most common mistake is slicing the apples too thick. Anything over 1/8 inch will result in a chewy, dried-fruit texture rather than a crispy chip. Another frequent error is overcrowding the pan. Air circulation is key to dehydration; if the apples are touching, moisture gets trapped between them. Many beginners also mistake the pliability of the hot apple chip for under-doneness. Remember that the ‘crunch’ sets in only after the chip has cooled completely. Finally, setting the oven temperature too high (like 350°F) in an attempt to speed up the process will only result in burnt, bitter apples that are still wet on the inside.
Serving Suggestions
These chips are fantastic on their own as a grab-and-go snack, but they also shine as a topping. Crumble them over morning oatmeal or yogurt parfaits for added texture. They make a beautiful and edible garnish for cocktails, mocktails, or warm apple cider. You can also serve them alongside a dip; a mixture of Greek yogurt, peanut butter, and honey makes a protein-packed dipping sauce that pairs perfectly with the cinnamon flavor. They are also excellent on a charcuterie board, providing a sweet, crunchy element to balance salty cheeses like cheddar or brie.
Storage and Reheating Tips
Moisture is the enemy of the apple chip. Store your completely cooled chips in an airtight container or a resealable bag with the air squeezed out. For best results, keep them at room temperature in a cool, dry place. They will stay crisp for up to 1 week. If you live in a humid climate and find that the chips have softened after a day or two, you can ‘refresh’ them by popping them back into a 200°F oven for 10-15 minutes and letting them cool again. Do not refrigerate them, as the humidity in the fridge will make them soggy immediately.
Nutrition Facts (Estimated)
| Serving Size | 1 cup |
| Calories | 95 |
| Fat | 0.3g |
| Saturated Fat | 0g |
| Unsaturated Fat | 0g |
| Trans Fat | 0g |
| Cholesterol | 0mg |
| Sodium | 2mg |
| Carbohydrates | 25g |
| Fiber | 4.4g |
| Sugar | 19g |
| Protein | 0.5g |
Frequently Asked Questions
Why are my apple chips soggy?
They likely weren’t baked long enough or were sliced too thick. Put them back in the oven for another 30 minutes, or ensure you are letting them cool completely on a wire rack.
Do I have to core the apples?
No, the core creates a beautiful star shape in the center. The seeds usually fall out during slicing, or you can easily pick them out.
Can I use a dehydrator instead of an oven?
Absolutely. Set your dehydrator to 135°F (57°C) and dry for 6-8 hours until crisp.
What is the best apple variety to use?
Honeycrisp, Fuji, and Pink Lady are top tier because they are firm and sweet. Granny Smith works if you like a tart, sour chip.
How long do these last?
When stored properly in an airtight container, they stay fresh and crisp for about one week.
Can I make these without cinnamon?
Yes, plain apple chips are delicious and highlight the pure fruit flavor. You can also just use a little salt.
Why did my chips burn?
Your oven might run hot, or the slices were too thin. Use an oven thermometer to verify the temperature is truly 200°F.
Is this snack keto-friendly?
Apples are higher in carbs/sugar, so they are generally not considered strict keto, but they are a healthy whole-food carb source.
Do I need to flip them?
Flipping is highly recommended to ensure the underside doesn’t stick to the parchment and to promote even airflow.
Can I use brown sugar?
You can, but use it sparingly. Brown sugar has molasses which adds moisture and can make it harder for the chip to crisp up.
Conclusion
Baked Cinnamon Apple Chips are the perfect example of how homemade food is often superior to the industrial alternative. They are simpler, healthier, and infinitely more delicious. By taking the time to slice, bake, and wait, you are rewarded with a snack that captures the very essence of the harvest season. Whether you are looking for a nutritious addition to your child’s lunchbox or a guilt-free treat to munch on while reading a book, these chips are sure to become a staple in your recipe rotation. So grab a bag of apples and let your oven do the work—your house will smell amazing, and your tastebuds will thank you.