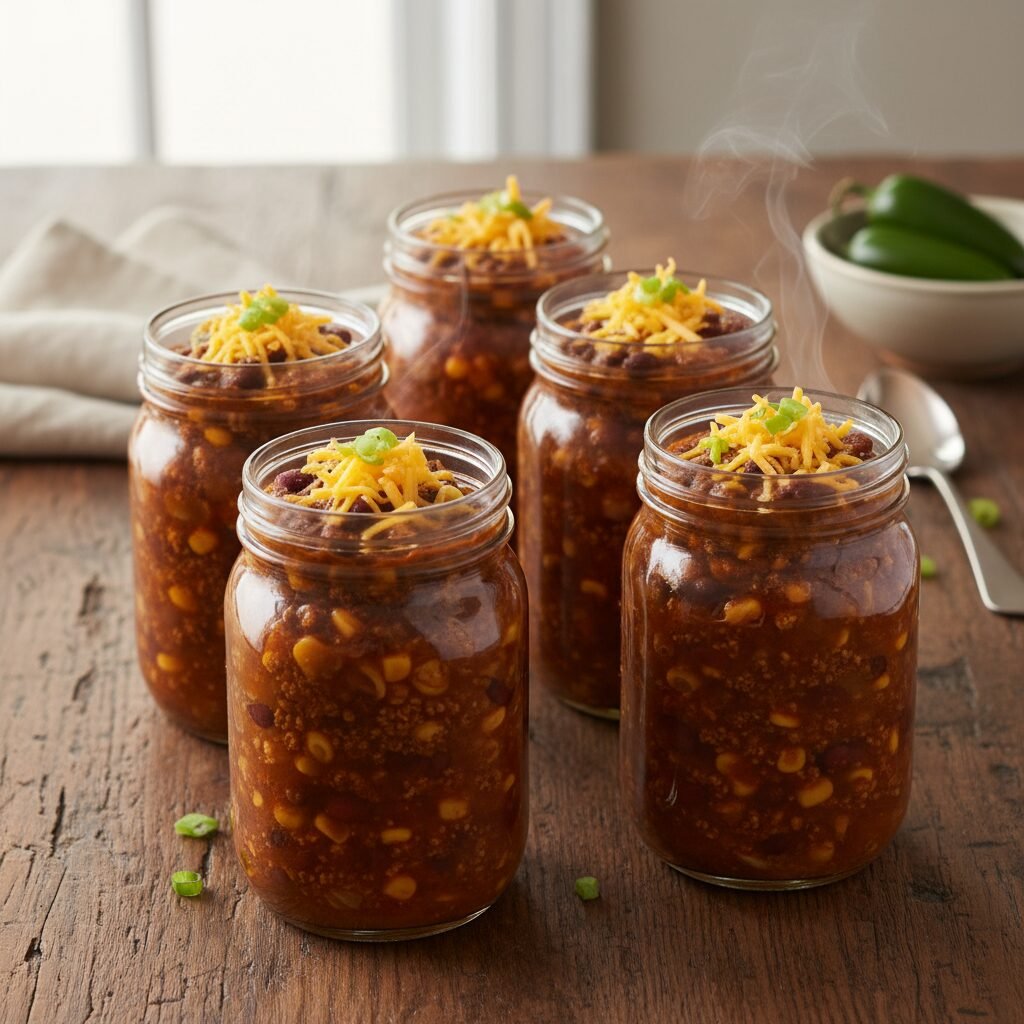
Ultimate Healthy Turkey Chili Meal Prep Jars
Turkey Chili Meal Prep Jar Healthy Recipe
Revolutionize your weekday lunches with these high-protein, low-calorie Turkey Chili Meal Prep Jars. Packed with lean turkey, hearty beans, and a smoky spice blend, these grab-and-go jars stay fresh for days and make healthy eating effortless.
20 minutes
40 minutes
1 hour
5 servings (16oz jars)
Main Course
Stovetop
American / Tex-Mex
Gluten-Free
In the hustle and bustle of modern life, maintaining a nutritious diet often falls by the wayside during the workweek. We find ourselves reaching for convenient, processed snacks or ordering takeout that leaves us feeling sluggish. Enter the Turkey Chili Meal Prep Jar: a beacon of hope for the busy professional, the stressed student, or the parent on the go. This recipe isn’t just about sustenance; it’s about reclaiming your lunch hour with a meal that is as comforting as it is healthy.
Imagine opening your fridge to see a neat row of colorful jars, each packed with layers of robust flavors and textures. This turkey chili is crafted to be lighter than its beef counterpart but makes zero compromises on flavor. We utilize a blend of smoked paprika, cumin, and chili powder to create a depth of savory goodness that permeates every bite of the lean ground turkey. The addition of black beans and kidney beans provides a double punch of fiber and plant-based protein, ensuring you stay full and focused throughout the afternoon.
What sets this recipe apart is its specific design for meal prepping. Unlike salads that can wilt or sandwiches that get soggy, chili actually improves with time. As the jars sit in the refrigerator, the spices meld together, marrying the acidity of the tomatoes with the earthiness of the beans and the richness of the turkey. By portioning them into glass jars, you not only control your serving size but also create a portable, leak-proof solution that can go straight from the fridge to the microwave. It is the ultimate comfort food, transformed into a modern nutritional powerhouse.
History & Origins
The history of chili is as rich and spicy as the dish itself, rooted deep in the American frontier. While many associate chili with Mexico, culinary historians generally agree that ‘Chili con Carne’ is a distinctively American creation, born in San Antonio, Texas. In the 19th century, the famous ‘Chili Queens’ of San Antonio sold bowls of spicy beef stew in the plazas, introducing the world to this fiery concoction. Traditionally, chili was a way to make tough cuts of meat palatable using native peppers and spices.
As the dish migrated across the United States, regional variations exploded—from the bean-less ‘Texas Red’ to the cinnamon-spiced Cincinnati chili served over spaghetti. However, the evolution towards Turkey Chili is a more modern phenomenon, emerging prominently during the health-conscious waves of the 1980s and 1990s. As public awareness of saturated fats and heart health grew, home cooks began seeking alternatives to red meat. Ground turkey became the champion substitute, offering a similar texture with a fraction of the fat.
The concept of the ‘Meal Prep Jar’ adds another layer to this history. The Mason jar, invented by John Landis Mason in 1858, was originally intended for preservation and canning. For over a century, it was a utilitarian tool for extending the harvest. However, with the rise of Pinterest and Instagram in the early 2010s, the Mason jar was rebranded as a symbol of rustic-chic aesthetics and organized living. The ‘salad in a jar’ trend paved the way for hot meals in jars, transforming the humble canning vessel into the ultimate lunchbox for the 21st century. This recipe represents the convergence of these histories: the frontier spirit of Texas chili, the health revolution of the late 20th century, and the digital age’s obsession with aesthetic efficiency.
Why This Recipe Works
This Turkey Chili Meal Prep Jar recipe works exceptionally well because it addresses the three main challenges of meal prepping: flavor preservation, texture maintenance, and nutritional balance. First, let’s talk about flavor. Lean ground turkey is naturally mild, which makes it the perfect canvas for bold spices. By blooming our spices—sautéing the chili powder, cumin, and paprika in the oil with the onions and garlic before adding the liquid—we unlock oil-soluble flavor compounds that water-based simmering simply cannot release. This technique ensures the turkey tastes rich and meaty, mimicking the satisfaction of beef.
Secondly, the texture is optimized for storage. Many meal prep recipes suffer from ‘mushiness’ after a few days. However, this chili is designed to be thick and hearty. We reduce the liquid content slightly compared to a stove-top soup to ensure it layers beautifully in a jar without becoming watery. The beans hold their structure well, and the acidity from the tomatoes helps tenderize the turkey without breaking it down into a paste.
Finally, the jar format itself creates a micro-environment that keeps the food fresh. Glass is non-porous and doesn’t absorb odors or stains like plastic containers. When you seal the chili while it’s still warm (but not boiling), it creates a slight vacuum seal as it cools, locking in freshness and extending the fridge life up to 5 days. This means your Friday lunch tastes just as fresh as your Monday lunch.
Why You’ll Love This Recipe
- ✓High protein content keeps you full for hours.
- ✓Meal prep friendly: stays fresh for up to 5 days.
- ✓Gluten-free and dairy-free adaptable.
- ✓Cost-effective ingredients for budget-friendly lunches.
- ✓Portable glass jars are eco-friendly and microwave safe.
Equipment You’ll Need
- ✓Large Dutch oven or heavy-bottomed pot
- ✓Wooden spoon or spatula
- ✓Chef’s knife
- ✓Cutting board
- ✓Can opener
- ✓5 x 16oz Wide-Mouth Mason Jars with lids
- ✓Ladles
- ✓Wide-mouth funnel (optional but helpful)
Ingredients
- ✓1 tbsp olive oil
- ✓1 large yellow onion, diced
- ✓1 red bell pepper, diced
- ✓3 cloves garlic, minced
- ✓1.5 lbs lean ground turkey (93/7 blend)
- ✓2 tbsp chili powder
- ✓1 tbsp ground cumin
- ✓1 tsp smoked paprika
- ✓1/2 tsp dried oregano
- ✓1/2 tsp salt (adjust to taste)
- ✓1/4 tsp black pepper
- ✓1 can (28 oz) crushed tomatoes
- ✓1 can (15 oz) black beans, drained and rinsed
- ✓1 can (15 oz) kidney beans, drained and rinsed
- ✓1 cup low-sodium chicken broth
- ✓1 cup frozen corn kernels
- ✓Optional toppings: Shredded cheddar cheese, green onions, Greek yogurt
Instructions
- Heat the olive oil in a large Dutch oven or heavy pot over medium-high heat.
- Add the diced onion and red bell pepper. Sauté for 5-7 minutes until the onions are translucent and peppers are soft.
- Add the minced garlic and cook for another minute until fragrant, being careful not to burn it.
- Add the ground turkey to the pot. Break it apart with your wooden spoon and cook until browned and no longer pink, approximately 7-10 minutes.
- Sprinkle the chili powder, cumin, smoked paprika, oregano, salt, and pepper over the meat mixture. Stir constantly for 1-2 minutes to bloom the spices and coat the turkey evenly.
- Pour in the crushed tomatoes (with their juices), drained black beans, drained kidney beans, and chicken broth. Stir well to combine.
- Bring the mixture to a boil, then reduce the heat to low. Cover and simmer for 25 minutes, stirring occasionally to prevent sticking.
- Stir in the frozen corn and simmer uncovered for an additional 5-10 minutes to allow the chili to thicken slightly.
- Taste and adjust seasoning with more salt or chili powder if desired. Remove from heat and let the chili cool for at least 15-20 minutes before jarring.
- Line up your 5 mason jars. Using a ladle and a funnel, distribute the chili evenly among the jars, leaving about an inch of headspace at the top.
- If using toppings like cheese or green onions, place them on top of the cooled chili. (Note: Keep crunchy toppings like tortilla chips separate until serving).
- Seal the jars tightly with lids and store in the refrigerator for up to 5 days.
Expert Cooking Tips
- ✓Bloom your spices in the fat (oil and turkey fat) before adding liquids to intensify the flavor.
- ✓Use a wide-mouth funnel to fill the jars without making a mess on the rims.
- ✓Let the chili cool slightly before sealing the jars to prevent a vacuum seal that is too difficult to open later.
- ✓If you prefer a spicier chili, add a diced jalapeño with the onions or a pinch of cayenne pepper with the spices.
- ✓Rinsing the canned beans removes excess sodium and starch, resulting in a cleaner flavor and better texture.
Substitutions and Variations
This recipe is incredibly versatile and forgiving. If you are not a fan of ground turkey, you can easily substitute it with lean ground beef, ground chicken, or even a plant-based meat alternative for a vegan version. For a vegetarian option, simply omit the meat entirely and add an extra can of beans (pinto beans or chickpeas work great) and diced sweet potatoes for bulk. If you don’t have red bell peppers, green peppers, zucchini, or carrots make excellent veggie additions. The chicken broth can be swapped for vegetable broth or beef broth depending on your protein choice. For those watching their sodium intake, opt for ‘no salt added’ canned tomatoes and beans.
Common Mistakes to Avoid
One of the most common mistakes when making turkey chili is under-seasoning. Turkey is much leaner and milder than beef, so it requires a heavy hand with spices to avoid tasting bland. Don’t be afraid to taste and adjust the salt and chili powder at the end. Another mistake is jarring the chili while it is boiling hot; this can raise the internal temperature of your fridge and compromise other foods. Allow it to cool until it stops steaming heavily. Finally, avoid adding toppings like tortilla chips or crackers directly into the jar, as they will become soggy instantly. Store crunchy elements in a separate small bag or container.
Serving Suggestions
To serve, simply remove the metal lid from the mason jar. If you have packed toppings that shouldn’t be heated (like sour cream or avocado), scoop them out first. Microwave the jar for 2-3 minutes, stopping halfway to stir. Alternatively, pour the contents into a bowl to heat. Serve with a side of cornbread, a handful of tortilla chips, or a fresh green salad. A dollop of plain Greek yogurt is a fantastic, high-protein substitute for sour cream that adds a creamy tang to the spicy chili.
Storage and Reheating Tips
These meal prep jars are designed to last in the refrigerator for up to 5 days. Ensure the lids are screwed on tightly to maintain freshness. If you want to prep for longer than a week, this chili freezes beautifully. However, glass jars can crack in the freezer if overfilled due to liquid expansion. If freezing, leave at least 1.5 to 2 inches of headspace at the top of the jar and cool the chili completely in the fridge before moving it to the freezer. Thaw frozen jars in the refrigerator overnight before reheating.
Nutrition Facts (Estimated)
| Serving Size | 1 jar (approx 16oz) |
| Calories | 380 |
| Fat | 10g |
| Saturated Fat | 2.5g |
| Unsaturated Fat | 7g |
| Trans Fat | 0g |
| Cholesterol | 65mg |
| Sodium | 650mg |
| Carbohydrates | 42g |
| Fiber | 12g |
| Sugar | 6g |
| Protein | 32g |
Frequently Asked Questions
Can I freeze the chili in the mason jars?
Yes, but you must leave at least 2 inches of space at the top of the jar to allow the liquid to expand as it freezes, otherwise the glass will shatter. Ensure the chili is completely cool before freezing.
How do I reheat the chili in the jar?
Remove the metal lid and ring. Place the glass jar in the microwave and heat on high for 2-3 minutes, stirring halfway through. Be careful when removing the jar as the glass will be hot.
Can I use dried beans instead of canned?
Absolutely. You will need to soak and cook the dried beans separately before adding them to the chili, as the simmering time for the chili isn’t long enough to cook raw dried beans.
Is this recipe spicy?
It has a mild to medium kick depending on your chili powder. To make it milder, reduce the chili powder to 1 tablespoon. To make it hotter, add cayenne pepper or fresh jalapeños.
What size mason jars should I use?
We recommend 16oz (pint) wide-mouth mason jars. They are the perfect size for a generous single serving lunch.
Can I make this in a slow cooker?
Yes! Brown the turkey, onions, and garlic in a pan first, then transfer everything to a slow cooker. Cook on low for 6-8 hours or high for 3-4 hours.
How can I make this dairy-free?
The chili base itself is naturally dairy-free. Just skip the cheese topping or use a vegan cheese alternative and coconut yogurt.
Why does my turkey taste dry?
Turkey is very lean. Ensure you don’t overcook it during the browning phase, and make sure there is enough liquid in the chili to keep it moist during the simmer.
Conclusion
Embracing the meal prep lifestyle doesn’t mean you have to sacrifice flavor or variety. These Turkey Chili Meal Prep Jars prove that with a little planning and the right ingredients, you can enjoy a hot, wholesome, and deeply satisfying meal every day of the week. Whether you are looking to save money, eat healthier, or simply save time, this recipe is a reliable staple that will serve you well. Give it a try this Sunday, and thank yourself when Wednesday rolls around!